Setting up Kali Linux (as the only operating system) on your machine is a straightforward task. This walkthrough explains the standard installation process, which can be done directly on your hardware or inside a virtual machine, with an optional step to secure the storage using disk encryption. If you’re dealing with sensitive files, you may want to enable Full Disk Encryption (FDE). During setup, you can choose to perform an encrypted LVM installation on either a hard drive or a USB stick.
Before starting, make sure your computer meets the basic requirements. Kali Linux works on 64-bit (amd64) systems and doesn’t demand high-end hardware, though stronger specs will naturally improve speed and performance. It supports both modern UEFI-based systems and older BIOS-based ones.
For this demonstration, we’ll be installing Kali Linux on a new virtual machine with no preloaded operating systems. Other installation scenarios will also be discussed along the way.
System Requirements
The installation requirements for Kali Linux will vary depending on what you would like to install and your setup. For system requirements:
- On the low end, you can set up Kali Linux as a basic Secure Shell (SSH) server with no desktop, using as little as 128 MB of RAM (512 MB recommended) and 2 GB of disk space.
- On the higher end, if you opt to install the default Xfce4 desktop and the
kali-linux-defaultmetapackage, you should really aim for at least 2 GB of RAM and 20 GB of disk space.- When using resource-intensive applications, such as Burp Suite, they recommend at least 8 GB of RAM (and even more if it is a large web application!) or using simultaneous programs at the same time.
Installation Prerequisites
This guide will make also the following assumptions when installing Kali Linux:
- Using the amd64 installer image.
- CD/DVD drive / USB boot support.
- Single disk to install to.
- Connected to a network (with DHCP & DNS enabled) which has outbound Internet access.
Note: This will be wiping any existing data on the hard disk, so please backup any important information on the device to an external media.
Preparing for the Installation
- Download Kali Linux (We recommend the image marked Installer).
- Burn The Kali Linux ISO to DVD or image Kali Linux Live to USB drive. (If you cannot, check out the Kali Linux Network Install).
- Backup any important information on the device to an external media.
- Ensure that your computer is set to boot from CD/DVD/USB in your BIOS/UEFI.
- In the UEFI settings, ensure that Secure Boot is disabled. The Kali Linux kernel is not signed and will not be recognized by Secure Boot.
Kali Linux Installation Procedure
Boot
- To start your installation, boot with your chosen installation medium. You should be greeted with the Kali Linux Boot screen. Choose either Graphical install or Install (Text-Mode). In this example, we chose the Graphical install.
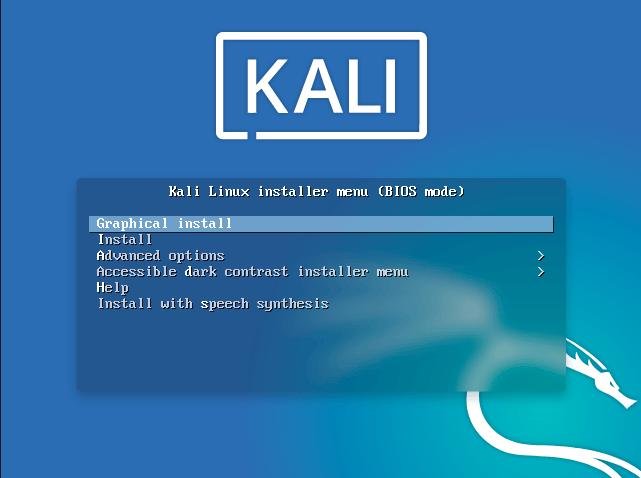
Note: If you’re using the live image instead, you will see another mode, Live, which is also the default boot option.

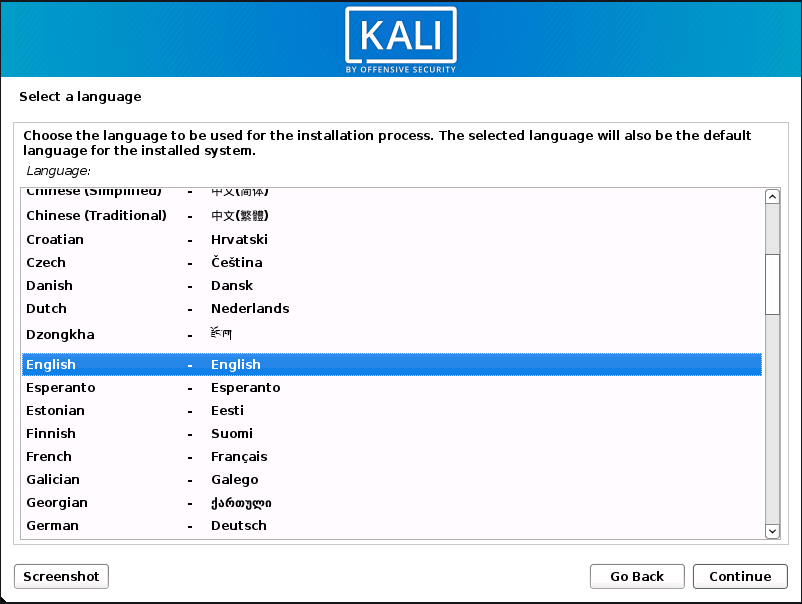
Language
- Select your preferred language. This will be used for both the setup process and once you are using Kali Linux.
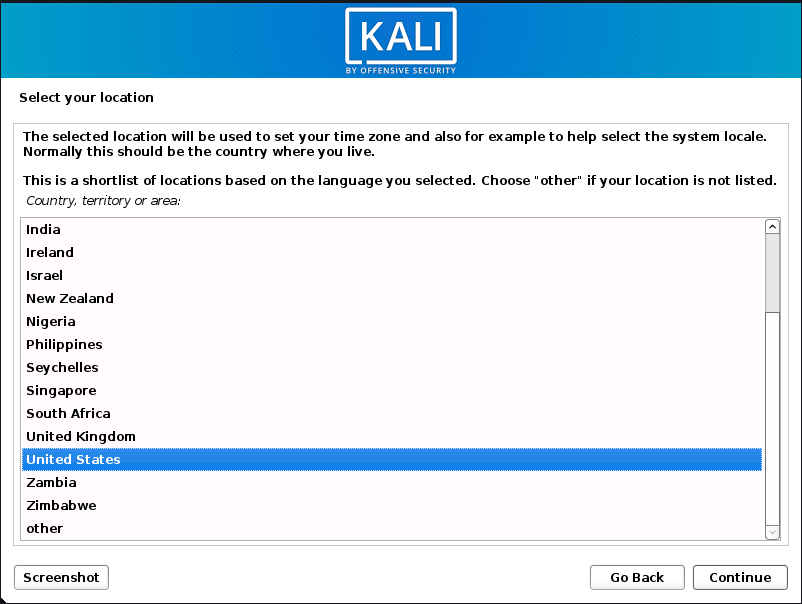
3. Specify your geographic location.
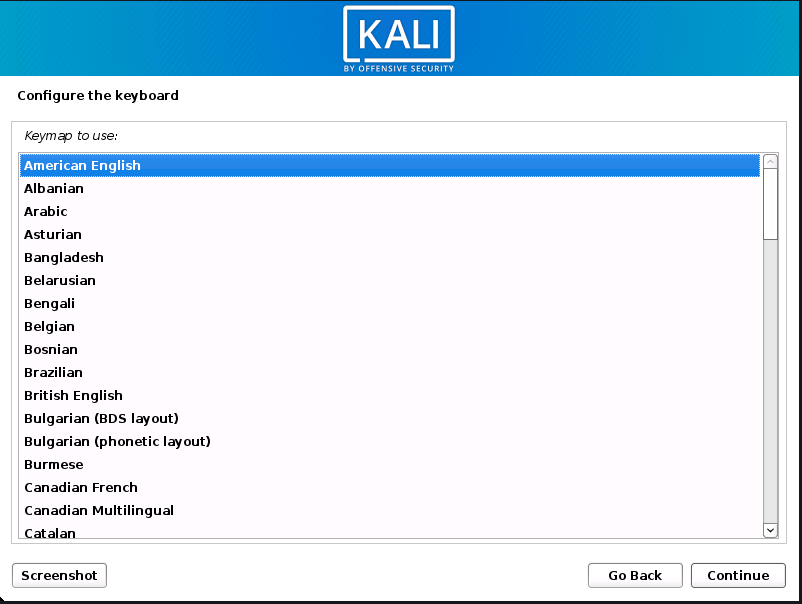
4. Select your keyboard layout.
Network
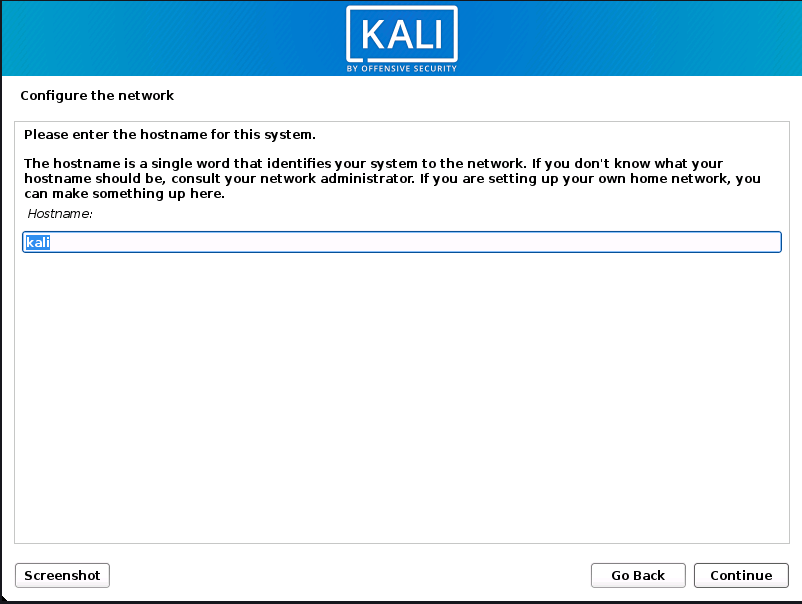
- At this stage, the installer will check your network interfaces and attempt to connect using DHCP. After that, you’ll be asked to choose a hostname (the name that identifies your computer on the network). For example, in this guide we’ll use kali as the hostname, but you can enter any name you prefer.For example, in this guide we’ll use kali as the hostname, but you can enter any name you prefer.
Note: If there is no network access with DHCP service detected, you may need to manually configure the network information or do not configure the network at this time.
- If there’s no DHCP server available on your network, the installer will prompt you to manually enter details like the IP address, gateway, and DNS. You can also choose to skip this step if needed.
- In cases where Kali Linux cannot detect your network interface card (NIC), you’ll either need to provide the drivers when asked or create a custom Kali Linux ISO image that already includes them.
- If your system has more than one NIC, the installer will ask you to pick which one should be used during installation.
- For wireless NICs (802.11), you’ll be asked to enter your Wi-Fi network information (SSID and password) before moving on to setting the hostname for your machine.
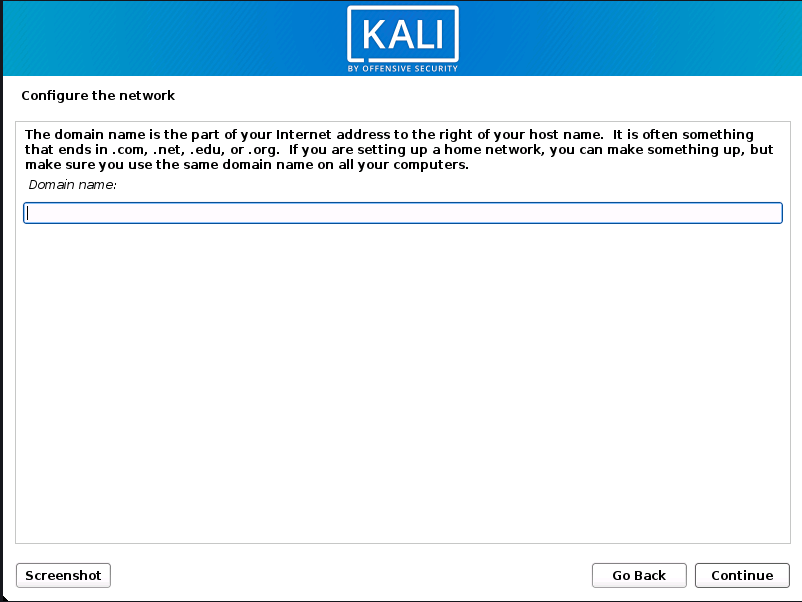
6. You can also enter a default domain name for your system if you want. In many cases, this value is automatically provided by a DHCP server or taken from another operating system already on the machine.
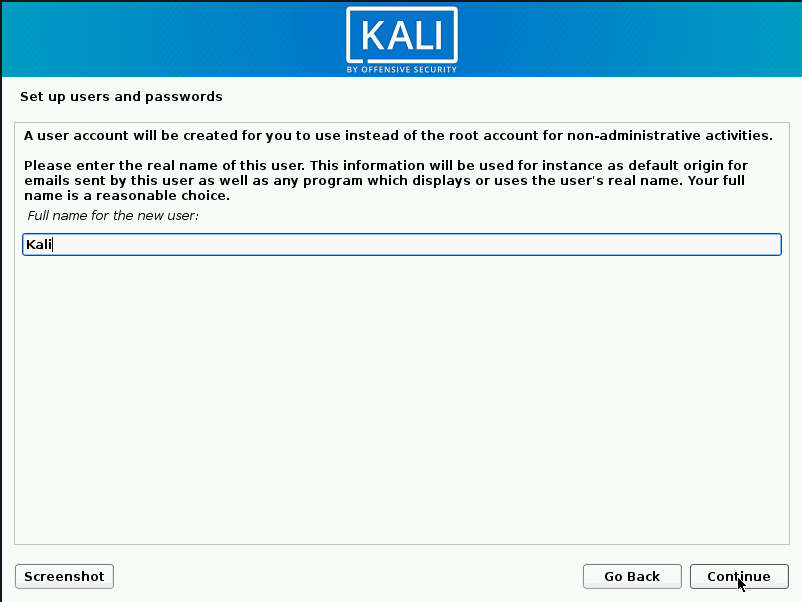
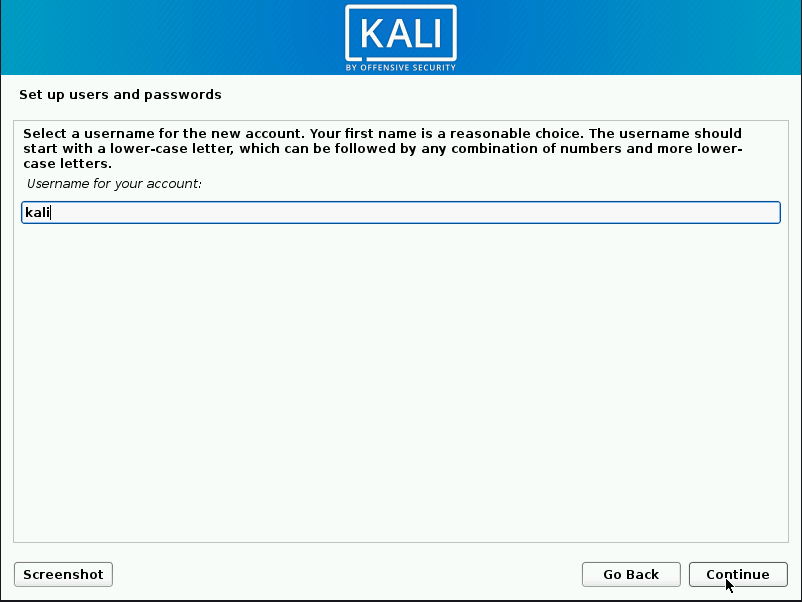
User Accounts
7. Next, you’ll need to set up a user account for daily use. This involves entering:
- Full Name – Your personal name (or any identifier you like).
- Username – The short name you’ll use to log in.
- Password – Choose a strong password to keep your system secure.
It’s recommended to avoid using simple or common passwords since this account will be your main way of accessing the system.

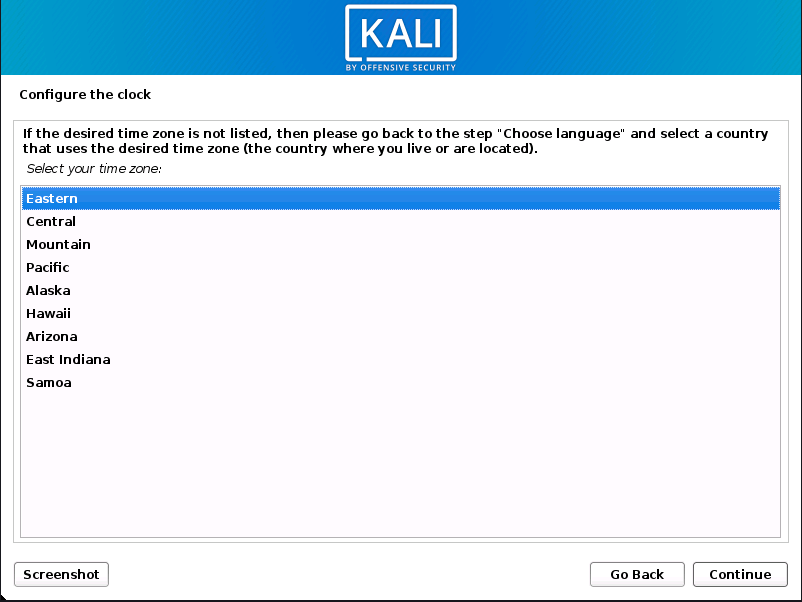
Clock
- Next, set your time zone.
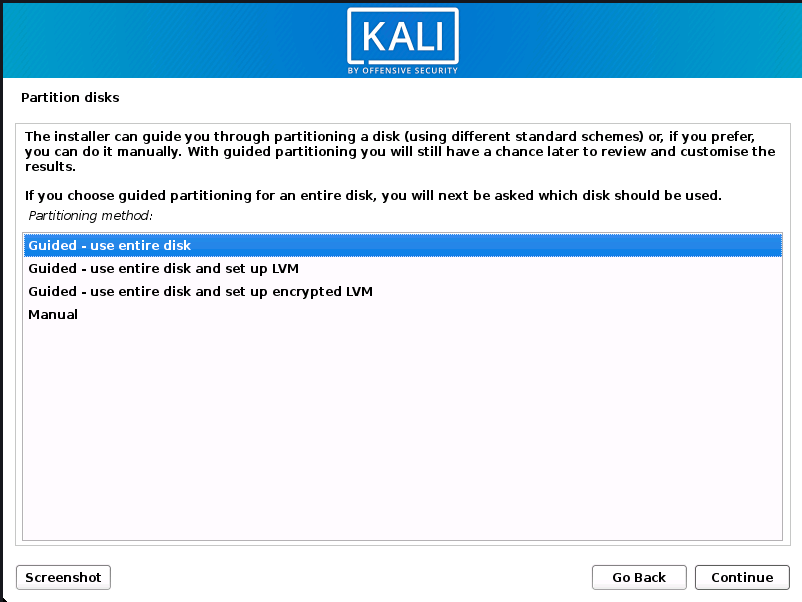
Disk Setup
The installer will now scan your storage devices and show you the available installation options. Since we’re using a clean disk in this example, you’ll see four choices.
For a single-boot installation (Kali Linux as the only OS), the easiest option is:
- Guided – Use Entire Disk → This will erase everything on the drive and install Kali Linux.
⚠️ Warning: This choice will remove all existing data on that disk. Make sure you’ve backed up anything important.
If your disk already has another operating system, you may also see an extra option:
- Guided – Use the Largest Free Space → This installs Kali Linux alongside your current OS without deleting existing data, which is great for dual-boot setups.
Advanced users can choose the Manual option for complete control over partitions.
Encryption Option (Optional)
If you want stronger security, you can select:
- Guided – Use Entire Disk and Set Up Encrypted LVM
This enables Full Disk Encryption (FDE). Later in the process, you’ll be asked to create and confirm an encryption password. You’ll need to enter this password every time you boot into Kali Linux.
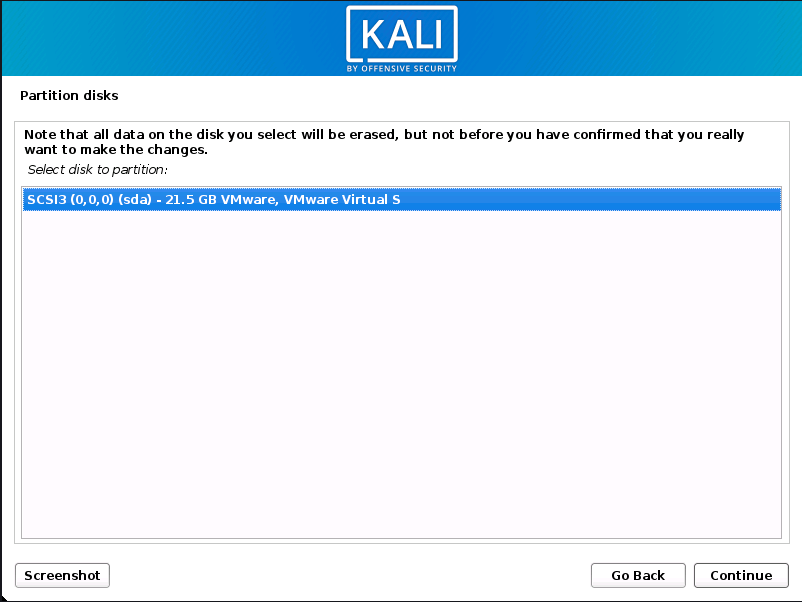
10. Select the disk to be partitioned.
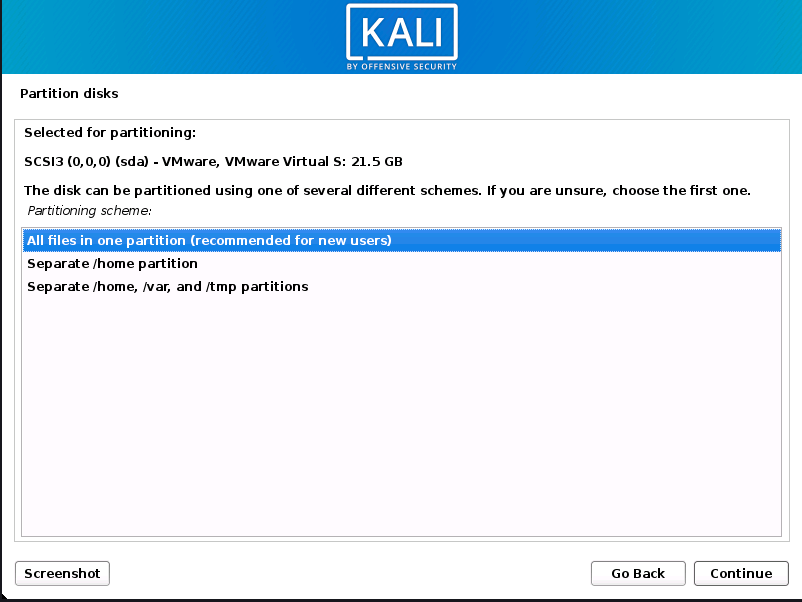
- Depending on your needs, you can choose to keep all your files in a single partition – the default – or to have separate partitions for one or more of the top-level directories.
If you’re not sure which you want, you want “All files in one partition”.
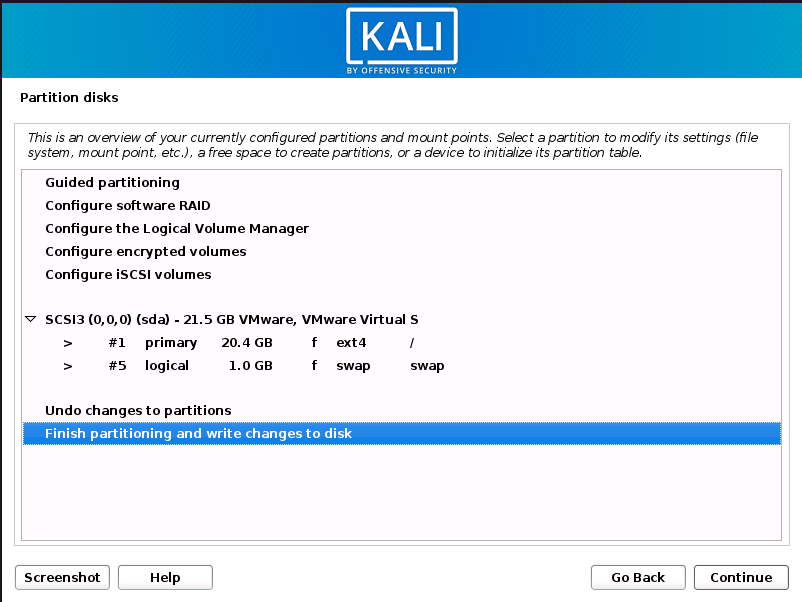
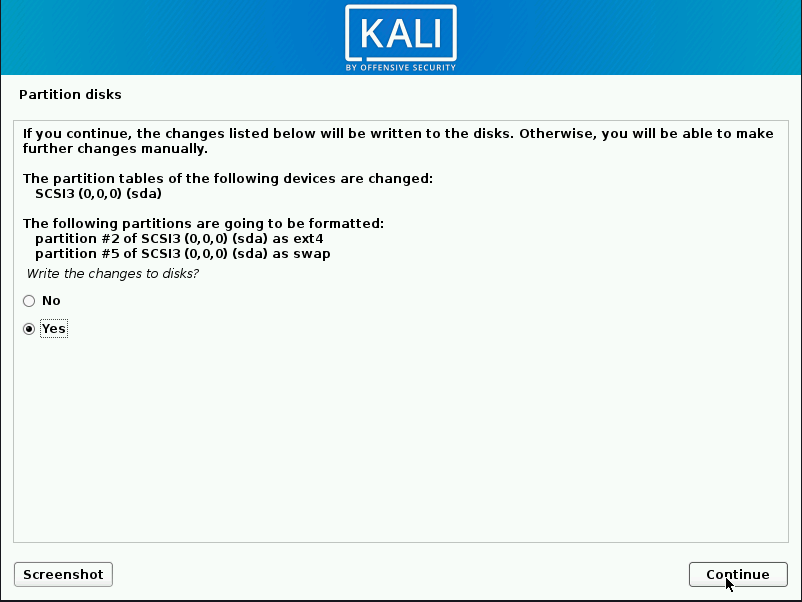
12. Before making any changes, the installer will give you a last chance to review your partition setup. Double-check that everything looks correct, since this step is irreversible and will erase data if you chose the “entire disk” option.
Once you’re ready, select Continue. The installer will then begin writing the changes to disk and proceed with installing Kali Linux. At this point, your system is almost fully set up.
Encrypted LVM
If you selected the encrypted LVM option earlier, the installer will first perform a secure wipe of the hard drive to prepare it for encryption. After this process, you’ll be asked to create an encryption password.
Make sure you choose a strong passphrase (a mix of letters, numbers, and symbols). If the password is too simple, the installer will warn you that it’s weak.
⚠️ Remember: You’ll need to enter this password every time you start your computer to unlock and boot into Kali Linux.
The secure wipe process can take quite some time — sometimes even a few hours, depending on your disk’s size and speed. If you prefer to save time, you can choose to skip the wipe, but keep in mind this comes with a small security risk since old data might still be recoverable.
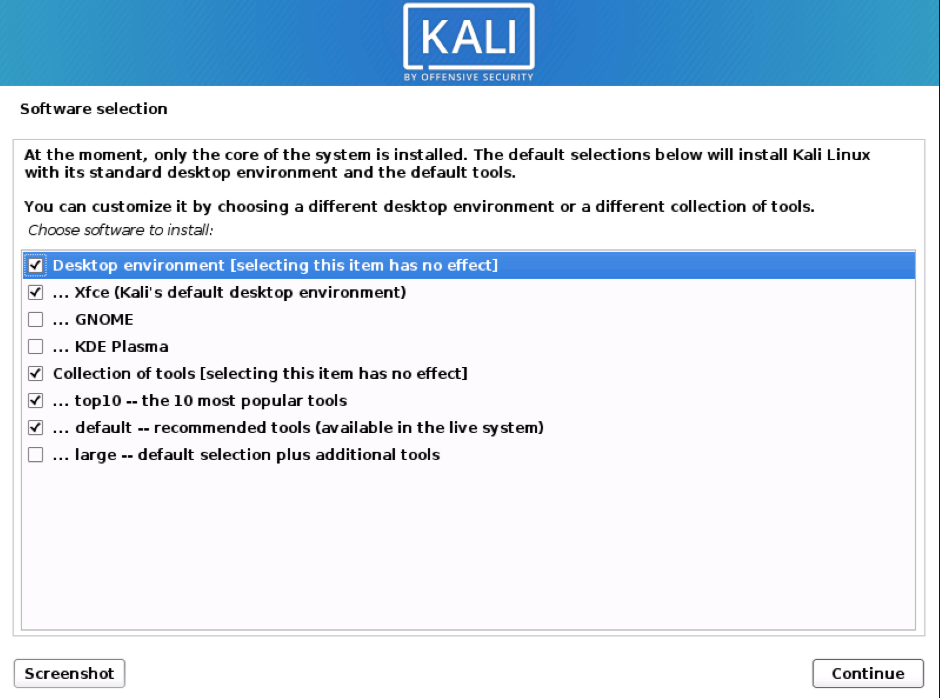
Metapackages
If network access was not setup, you will want to continue with setup when prompt.
If you are using the Live image, you will not have the following stage.
- Next you can select which metapackages you would like to install. The default selections will install a standard Kali Linux system and you don’t really have to change anything here.
Please refer to this guide if you prefer to change the default selections.
Boot Information
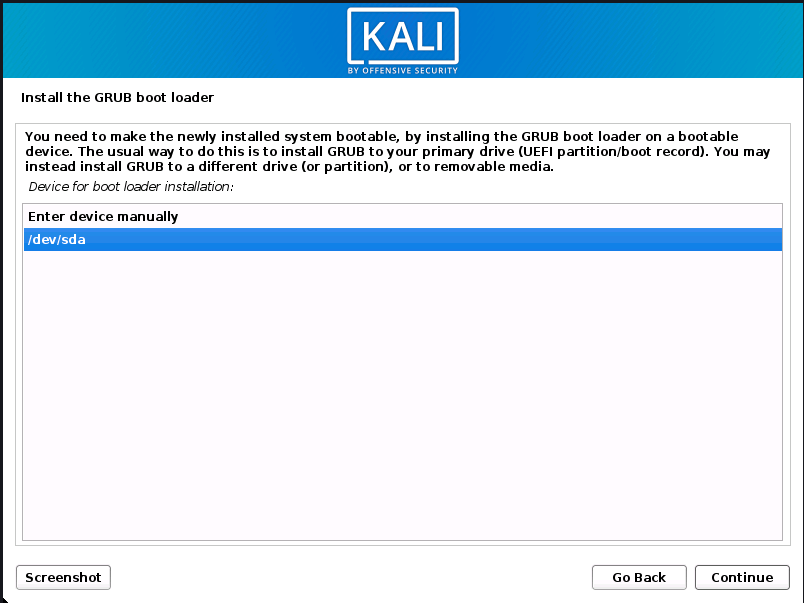
- Next confirm to install the GRUB boot loader.
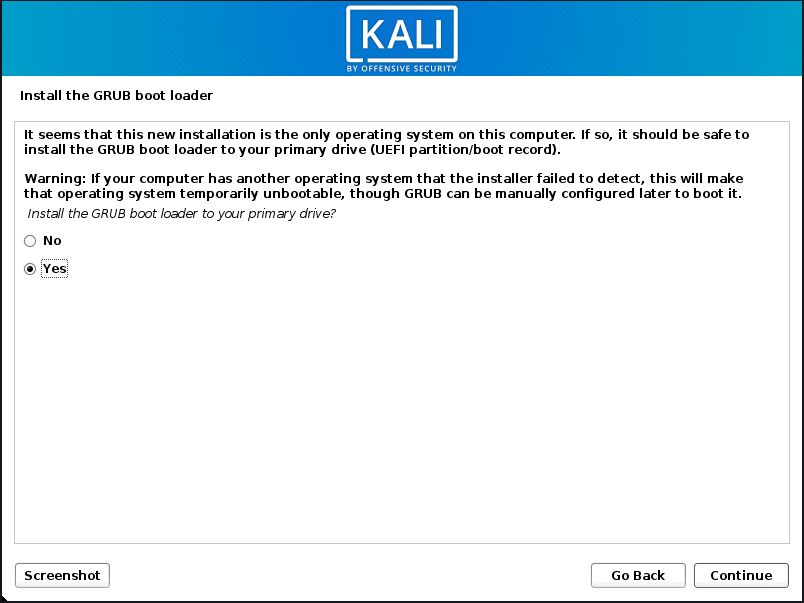
16. The installer will ask where to install the GRUB bootloader. GRUB is the program that loads your operating system every time you turn on your computer.
- Select the hard drive where you installed Kali Linux (not just a single partition).
- By default, no drive is chosen, so you’ll need to pick one manually.
⚠️ Important: If you skip installing GRUB, your computer will not know how to start Kali Linux after reboot. In that case, you’d have to manually fix the bootloader later, which can be complicated for beginners.
For most users, simply choosing the main hard drive is the best option.